This is the video from LaraconEU 2016 on Making the Most out of MySQL.
Tag: laravel
Creating Migrations with Liquibase
Liquibase is a versioning tool for databases. Currently, it’s on version 3.5 and is installed as a JAR. It has been on the market since 2006, and recently completed its 10th anniversary. In its feature list we have:
- Code branching and merging
- Multiple database types
- Supports XML, YAML, JSON and SQL formats
- Supports context-dependent logic
- Generate Database change documentation
- Generate Database “diffs”
- Run through your build process, embedded in your application or on demand
- Automatically generate SQL scripts for DBA code review
- Does not require a live database connection
Why you need it?
Some frameworks comes with built-in solutions out of the box like Eloquent and Doctrine. There is nothing wrong with using something like that when you have only one DB per project, but when you have multiple systems, it starts to get complicated.
Since Liquibase works as a versioning tool, you can branch and merge as needed (like you would with code in git). You have contexts, which means changes can be applied to specific environments only, and tagging capabilities allow you to perform rollbacks.
A rollback is a tricky thing; you can either do an automatic rollback or define a script. Scripted rollbacks are useful when dealing with MySQL, for instance, where DDL changes are NOT transactional.
Guidelines for changelogs and migrations
- MUST be written using the
JSONformat. Exceptions arechanges/legacy/base.xmlandchanges/legacy/base_procedures_triggers.sql. - MUST NOT be edited. If a new column is to be added, a new migration file must be created and the file MUST be added AFTER the last run transaction.
Branching
There could be 3 main branches:
production(master)stagingtesting
Steps:
- Create your changelog branch;
- Merge into
testing; - When the feature ready to staging, merge into
staging; - When the feature is ready, merge into
production.
Example:

Rules:
testing,stagingandproductionDO NOT merge amongst themselves in any capacity;- DO NOT rebase the main branches;
- Custom branch MUST be deleted after merged into
production.
The downside of this approach is the diverging state between the branches. Current process is to, from time to time, compare the branches and manually check the diffs for unplanned discrepancies.
Procedures for converting a legacy database to Liquibase migrations
Some projects are complete monoliths. More than one application connects to it, and this is not a good practice. If you are working with that sort of project, I recommend you treating the database sourcing as its own repository, and not together with your application.
Writing migrations
This is a way I found for keeping the structure reasonably sensible. Suggestions are welcome.
Create the property file
Should be in the root of the project and be named liquibase.properties:
driver: com.mysql.jdbc.Driver
classpath: /usr/share/java/mysql-connector-java.jar:/usr/share/java/snakeyaml.jar
url: jdbc:mysql://localhost:3306/mydb
username: root
password: 123
The JAR files in the classpath can be manually downloaded or installed though the server package manager.
Create the Migration file
You can choose between different formats. I chose to use JSON. In this instance I will be running this SQL:
This file contains hidden or bidirectional Unicode text that may be interpreted or compiled differently than what appears below. To review, open the file in an editor that reveals hidden Unicode characters.
Learn more about bidirectional Unicode characters
| CREATE TABLE `mydb_users` ( | |
| `id` int(11) NOT NULL AUTO_INCREMENT, | |
| `username` varchar(25) CHARACTER SET utf8 DEFAULT NULL, | |
| `password` varchar(255) CHARACTER SET utf8 DEFAULT NULL, | |
| `activated` tinyint(1) NOT NULL DEFAULT '0', | |
| PRIMARY KEY (`id`) | |
| ) ENGINE=InnoDB DEFAULT CHARSET=utf8 COLLATE=utf8_unicode_ci; |
Which will translate to this:
This file contains hidden or bidirectional Unicode text that may be interpreted or compiled differently than what appears below. To review, open the file in an editor that reveals hidden Unicode characters.
Learn more about bidirectional Unicode characters
| { | |
| "databaseChangeLog": [ | |
| { | |
| "changeSet": { | |
| "id": "create_mydb_users", | |
| "author": "gabidavila", | |
| "changes": [ | |
| { | |
| "createTable": { | |
| "tableName": "mydb_users", | |
| "columns": [ | |
| { | |
| "column": { | |
| "name": "id", | |
| "type": "int unsigned", | |
| "autoIncrement": true, | |
| "constraints": { | |
| "primaryKey": true, | |
| "nullable": false | |
| } | |
| } | |
| }, | |
| { | |
| "column": { | |
| "name": "username", | |
| "type": "varchar(25)", | |
| "encoding": "utf8", | |
| "constraints": { | |
| "nullable": true | |
| } | |
| } | |
| }, | |
| { | |
| "column": { | |
| "name": "password", | |
| "type": "varchar(255)", | |
| "encoding": "utf8", | |
| "constraints": { | |
| "nullable": true | |
| } | |
| } | |
| }, | |
| { | |
| "column": { | |
| "name": "activated", | |
| "type": "tinyint", | |
| "defaultValueNumeric": 0, | |
| "constraints": { | |
| "nullable": false | |
| } | |
| } | |
| } | |
| ] | |
| } | |
| } | |
| ] | |
| }, | |
| "modifySql": { | |
| "dbms": "mysql", | |
| "append": [ | |
| { | |
| "value": " ENGINE=InnoDB DEFAULT CHARSET=utf8 COLLATE=utf8_unicode_ci" | |
| } | |
| ] | |
| } | |
| } | |
| ] | |
| } |
It is verbose? Yes, completely, but then you have a tool to show you what the SQL will look like and be able to manage the rollbacks.
Save the file as:
.
/changes
- changelog.json
- create_mydb_users.json
Where changelog.json looks like this:
This file contains hidden or bidirectional Unicode text that may be interpreted or compiled differently than what appears below. To review, open the file in an editor that reveals hidden Unicode characters.
Learn more about bidirectional Unicode characters
| { | |
| "databaseChangeLog": [ | |
| { | |
| "include": { | |
| "file": "changes/create_mydb_users.json" | |
| } | |
| } | |
| ] | |
| } |
For each new change you add it to the end of the databaseChangeLog array.
Run it
To run, execute:
$ liquibase –changeLogFile=changes/changelog.json migrate
Don’t worry if you run it twice, the change only happens once.
Next post will cover how to add a legacy DB into Liquibase.
To learn how to go deeper into Liquibase formats and documentation, access this link.
Impressions over my talk at Laracon EU 2014
On August 28th I presented to Laracon EU my talk about gender diversity titled: Coding Like a Girl: How teams with women gain with diversity.
My objective was to show data supporting that having women in the team is a good idea and actually a good strategy. What concerned me was in the how to approach such sensitive subject. Not everyone feel confortable in talking about that and it is hard to be totally impartial with this subject. Besides, I didn’t want to be interpreted as a feminazi.
But I was really surprised by the amount of people who stayed to see my talk! You have to understand: as a Brazilian whom never spoke in an international event before, I was very nervous, not just about my English, but about the crowd. Kayla Daniels, Frank de Jonge and Scott Wilcox definitely helped me with my cold feet (thank you all!).
And this year Laracon EU had 2 tracks in the community day, so it meant the event would have another talk in the same time as mine! I was sure no one would attend mine, I was almost talking to Shawn McCool to change me to the small room and having the other speaker to talk in the bigger room I was almost bolting out of there. Hence my surprise (and scared) face when I saw a good 70% of the people there to see me talk.
When I started talking, it was clear for the attendees that I was freaking out! BUT, I was able to get my emotions in control because I saw people’s faces, and I could see that for many of them what I was talking about was totally news, it was “I did not know it was like that” face. Probably because the majority was White Males, and other minorities were… minorities!
To see my message being listened and understood, it was incredibly joyful! It really made me happy. Although, I saw a guy sleeping in his chair…
For that incredible experience, I want to thank Laracon EU organization for bringing me there and giving me the opportunity to meet such wonderful people there! Thank you Shawn!
Links
My Slides:
My Joindin feedback: http://goo.gl/yy6lMf
P.S.: I will be giving his talk over Hangouts on Air this Thursday, September 18th, 2014, link to the event here: http://goo.gl/IwiVD8
Laravel with Grunt, Bower, Foundation and Sass
I needed to use Grunt and Bower with Laravel for a project. So, I did some digging, and found Harianto van Insulide tutorial. He used somethings similar with what I needed, so I followed his tutorial and made my own modifications. So this is the result!
Installing Dependencies
Composer
If you don’t have composer installed, just enter the following:
$ curl -sS https://getcomposer.org/installer | php
Ruby/Sass
If you use Windows , you need to download ruby: https://www.ruby-lang.org/pt/downloads/.
For Mac OS X , ruby already comes installed.
For Linux machine, you can download via apt-get or yum.
So, from that just run:
$ gem install compass
$ gem install sass
Laravel
To install, you can download the latest version in a package or use the composer command:
$ composer create-project laravel/laravel --prefer-dist
NodeJS
You can get the installer from NodeJS website: http://nodejs.org/download/.
Grunt and Bower
Both can be installed only globally, so if you want them to be installed locally just remove the -g to the command bellow:
$ npm install -g grunt-cli
$ npm install -g bower
Grunt Initialization
Grunt is a task runner, it allows you to automate the tasks of sass compiling, javascript minification, CND upload and every other task you need. Grunt comes with a lot of plugins, so you can just browse on their site to find some awesome ones!
I recommend doing the following commands inside
laravelfolder, you can do in the project root, but this is a personal choice, just remember of updating the path if you are using a different one.
So as we do withgit, we must do withgrunt:
$ npm init
You can fill the fields as I did:
name :
laravelTutorial
version :0.1.0
description :This is a Laravel with Grunt, Bower, Foundation and Sass Tutorial made by @gabidavila: http://gabriela.io
entry point :Gruntfile.js
test command : <kbd>Enter</kbd>
git repository :git@github.com:gabidavila/laravel-grunt-bower-foundation.git
keywords :laravel, grunt, foundation, sass, bower
author :Gabriela D'Avila <gabidavila>
license :MIT
A new file will be generated, package.json, there will be the information about your grunt configuration. Most importantly, where it is the Gruntfile.js. Do not worry about the scripts/tests item, you can change it in the future.
{
"name": "laravelTutorial",
"version": "0.1.0",
"description": "This is a Laravel with Grunt, Bower, Foundation and Sass Tutorial made by @gabidavila: http://en.davila.blog.br",
"main": "Gruntfile.js",
"scripts": {
"test": "echo \"Error: no test specified\" && exit 1"
},
"repository": {
"type": "git",
"url": "git remote add origin git@github.com:gabidavila/laravel-grunt-bower-foundation.git"
},
"keywords": [
"laravel",
"grunt",
"foundation",
"sass",
"bower"
],
"author": "Gabriela D'Avila <gabidavila>",
"license": "MIT",
"bugs": {
"url": "https://github.com/gabidavila/laravel-grunt-bower-foundation/issues"
},
"homepage": "https://github.com/gabidavila/laravel-grunt-bower-foundation"
}
Grunt Plugins
In this tutorial I’ll use some features of Grunt:
- Concat: makes all the javascript into a single file (
grunt-contrib-concat) - Uglify: minifies all the javascript (
grunt-contrib-uglify) - PHPUnit: allows us to run PHP unit tests (
grunt-phpunit) - Sass: to compile Sass (
grunt-contrib-sass)
To install is very simple, just run:
# --save-dev saves this plugins in package.json, so just keep them here :)

$ npm install grunt --save-dev
$ npm install grunt-contrib-concat --save-dev
$ npm install grunt-contrib-uglify --save-dev
$ npm install grunt-phpunit --save-dev
$ npm install grunt-contrib-compass --save-dev
$ npm install grunt-contrib-sass --save-dev

# OR a single command :O

$ npm install grunt grunt-contrib-concat grunt-contrib-uglify grunt-phpunit grunt-contrib-compass grunt-contrib-sass --save-dev
The --save-dev argument includes the plugins in your package.json file.
Bower
Bower is a package manager, a better description would be a dependency manager for the frontend, just like Composer does for everything else. You can learn more here: http://bower.io/.
When we ask bower to download our dependency as default it adds a bower_components folder in the same path as the command was made. So, we need to adjust the path to be more organized.
Create a .bowerrc file in your Laravel root:
{
"directory": "public/assets/vendor"
}
This will inform to bower where to download the dependencies.
Installing Foundation and other dependencies
As we do with composer lets create a bower.json file. Initially just add your project name:
{
"name": "laravelTutorial"
}
This file will be updated as dependency are installed with the -S argument. To install foundation:
$ bower install foundation -S
Foundation already install some dependencies, like jQuery, modernizr and fastclick. If you look at your bower.json file you’ll see:
{
"name": "laravelTutorial",
"dependencies": {
"foundation": "~5.3.3"
}
}
And at the public/assets/vendor folder:
public/assets/vendor/
 |-- fastclick
 |-- foundation
 |-- jquery
 |-- jquery-placeholder
 |-- jquery.cookie
 `-- modernizr
I did some organization in the structure of javascript and css, I created the following folders and files:
public/
 |-- assets
 | |-- stylesheets
 | | |-- base.scss # base from foundation
 | | |-- custom.scss # for customs scss
 | | `-- variables.scss # for custom variables
 | `-- javascripts
 | `-- custom.js # for customs javascript
 |-- css
 `-- js
The content of the file public/assets/stylesheets/base.scss is:
/*
* public/assets/stylesheets/base.scss
* Files from foundation
*/
@import 'variables';
@import '../vendor/foundation/scss/normalize';
@import '../vendor/foundation/scss/foundation';
The variables.scss file is a copy of _settings.scss, so you can customize your scss. You can see the content here.
Gruntfile.js
Now is the fun part. Here we will inform how we want grunt to behave. Where do we want it to put the compiled scss file, how to minify the files, etc.
This is a minimum Gruntfile.js template:
//Gruntfile
module.exports = function(grunt) {

//Initializing the configuration object
grunt.initConfig({

// Paths variables
paths: {
// Development where put SASS files, etc
assets: {
css: './public/assets/stylesheets/',
js: './public/assets/javascripts/',
vendor: './public/assets/vendor/'
},
// Production where Grunt output the files
css: './public/css/',
js: './public/js/'

},

// Task configuration
concat: {
//...
},
sass: {
//...
},
uglify: {
//...
},
phpunit: {
//...
},
watch: {
//...
}
});

// Plugin loading

// Task definition

};
Configuring SCSS compiling
In the sass section, add the following:
// Part of Gruntfile.js, this is the sass section
sass: {
css: {
options: {
style: 'compressed',
compass: true
},
// This will get all the scss files in /public/assets/stylesheets
files: [{
expand: true,
cwd: '<%= paths.assets.css %>',
src: '**/*.scss',
dest: '<%= paths.css %>',
ext: '.css',
}],
},
},

// This is at the end of the file, the plugin section:
// Plugin loading
grunt.loadNpmTasks('grunt-contrib-compass');
grunt.loadNpmTasks('grunt-contrib-sass');
Note that the end of the file we added the plugin loading for compass and sass. To see if this is working, just execute: grunt sass
The SCSS will be compiled into the public/css/base.css file.
The Javascript
Foundation uses some Javascript dependencies in different locations of the HTML file, so we have modernizr in the head section and jQuery at the footer section, so I think the best approach here is to separate these two, as js_header and js_footer. These two sections will get all the Javascript files and create respectively script_header.js and script_footer.js.
// Part of Gruntfile.js, this is the Concat section
concat: {
options: {
separator: ';',
},
js_header: {
src: [
'<%= paths.assets.vendor %>modernizr/modernizr.js',
'<%= paths.assets.js %>custom.js'
],
dest: '<%= paths.js %>expanded/scripts_header.js',
},
js_footer: {
src: [
'<%= paths.assets.vendor %>jquery/dist/jquery.js',
'<%= paths.assets.vendor %>jquery.cookie/jquery.cookie.js',
'<%= paths.assets.vendor %>jquery.placeholder/jquery.placeholder.js',
'<%= paths.assets.vendor %>fastclick/lib/fastclick.js',
'<%= paths.assets.vendor %>foundation/js/foundation.js'
],
dest: '<%= paths.js %>expanded/scripts_footer.js',
}
},

// This is at the end of the file, the plugin section:
// Plugin loading
grunt.loadNpmTasks('grunt-contrib-compass');
grunt.loadNpmTasks('grunt-contrib-sass');
grunt.loadNpmTasks('grunt-contrib-concat');
You can read more about Javascript files setup in Foundation here: http://foundation.zurb.com/docs/javascript.html.
To see if this is working, just execute: grunt concat, and the files will be added int /public/js directory, if you want to concat just the footer or the head section, use grunt concat:js_header or grunt concat:js_footer:
Files Generated by grunt concat
public
 `-- js
 `-- expanded
 |-- scripts_footer.js
 `-- scripts_header.js
Now, the javascript is all in single files as we defined, and to load faster we can minify them. The uglify task will be defined as bellow:
// Part of Gruntfile.js, this is the Uglify section
uglify: {
options: {
// Grunt can replace variables names, but may not be a good idea for you, I leave
// this option as false
mangle: false
},
js: {
// Grunt will search for "**/*.js" when the "minify" task
// runs and build the appropriate src-dest file mappings then, so you
// don't need to update the Gruntfile when files are added or removed.
files: [{
expand: true,
cwd: '<%= paths.js %>',
src: '**/*.js',
dest: '<%= paths.js %>min',
ext: '.min.js',
}],
}
},

// This is at the end of the file, the plugin section:
// Plugin loading
grunt.loadNpmTasks('grunt-contrib-compass');
grunt.loadNpmTasks('grunt-contrib-sass');
grunt.loadNpmTasks('grunt-contrib-concat');
grunt.loadNpmTasks('grunt-contrib-uglify');
After run grunt uglify, grunt will create a min folder inside /public/js with two files: script_header.min.js and script_footer.min.js.
Files Generated by grunt uglify
public
 `-- js
 |-- min
 | |-- scripts_footer.min.js
 | `-- scripts_header.min.js
 `-- expanded
 |-- scripts_footer.js
 `-- scripts_header.js
PHPUnit
So, if you work with PHPUnit, you can make Grunt run your tests for you. You just have to configure where the test classes are and the bin location. You may not have phpunit installed in your project, for that, add the following line in the composer.json file:
{
"require": {
"laravel/framework": "4.2.*",
"phpunit/phpunit": "4.*"
}
}
And run composer update to install the binary in /vendor/bin.
After, just add the phpunit in Gruntfile.js:
// Part of Gruntfile.js, this is the Uglify section
phpunit: {
classes: {
dir: 'app/tests/' //location of the tests
},
options: {
bin: 'vendor/bin/phpunit',
colors: true
}
},

// This is at the end of the file, the plugin section:
// Plugin loading
grunt.loadNpmTasks('grunt-contrib-compass');
grunt.loadNpmTasks('grunt-contrib-sass');
grunt.loadNpmTasks('grunt-contrib-concat');
grunt.loadNpmTasks('grunt-contrib-uglify');
grunt.loadNpmTasks('grunt-phpunit');
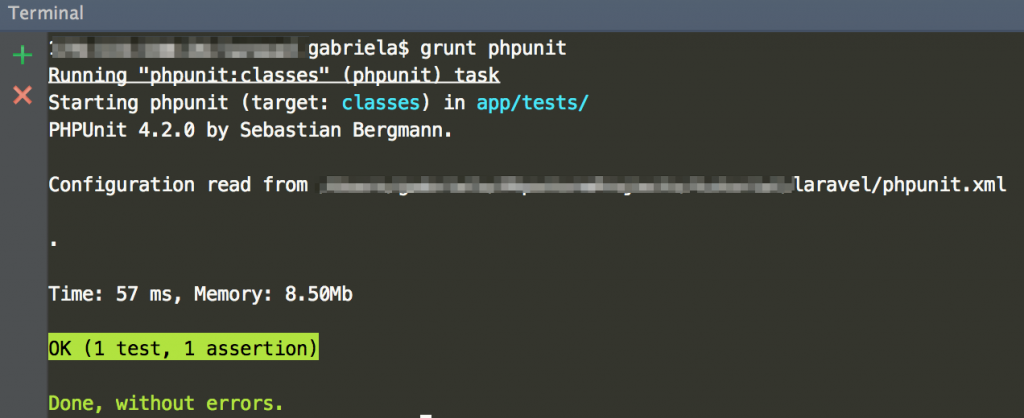
Running the tests: grunt phpunit
Bellow the output:
[{.img-responsive .img-thumbnail}](http://s3.davila.blog.br/wp-content/uploads/sites/2/2014/08/Gruntfile_js_-_laravel_-____PhpstormProjects_tutorial_laravel_1.png)
At last!
Until now we defined 4 tasks:
sassconcatuglifyphpunit
For running all 4 tasks with a single command, you can define a task, I defined that when I run grunt in the terminal, it will run all 4 tasks:
// Plugin loading
grunt.loadNpmTasks('grunt-contrib-compass');
grunt.loadNpmTasks('grunt-contrib-sass');
grunt.loadNpmTasks('grunt-contrib-concat');
grunt.loadNpmTasks('grunt-contrib-uglify');
grunt.loadNpmTasks('grunt-phpunit');

// Task definition
grunt.registerTask('default', ['sass', 'concat', 'uglify', 'phpunit']);
The final Gruntfile.js:
//Gruntfile
module.exports = function (grunt) {

//Initializing the configuration object
grunt.initConfig({

// Paths variables
paths: {
// Development where put SASS files, etc
assets: {
css: './public/assets/stylesheets/',
js: './public/assets/javascripts/',
vendor: './public/assets/vendor/'
},
// Production where Grunt output the files
css: './public/css/',
js: './public/js/'

},

// Task configuration
concat: {
options: {
separator: ';',
},
js_header: {
src: [
'<%= paths.assets.vendor %>modernizr/modernizr.js',
'<%= paths.assets.js %>custom.js',
],
dest: '<%= paths.js %>expanded/scripts_header.js',
},
js_footer: {
src: [
'<%= paths.assets.vendor %>jquery/dist/jquery.js',
'<%= paths.assets.vendor %>jquery.cookie/jquery.cookie.js',
'<%= paths.assets.vendor %>jquery.placeholder/jquery.placeholder.js',
'<%= paths.assets.vendor %>fastclick/lib/fastclick.js',
'<%= paths.assets.vendor %>foundation/js/foundation.js'
],
dest: '<%= paths.js %>expanded/scripts_footer.js',
}
},
sass: {
css: {
options: {
style: 'compressed',
compass: true
},
files: [
{
expand: true,
cwd: '<%= paths.assets.css %>',
src: '**/*.scss',
dest: '<%= paths.css %>',
ext: '.css',
}
],
},
},
uglify: {
options: {
// Grunt can replace variables names, but may not be a good idea for you,
// I leave this option as false
mangle: false
},
js: {
// Grunt will search for "**/*.js" when the "minify" task
// runs and build the appropriate src-dest file mappings then, so you
// don't need to update the Gruntfile when files are added or removed.
files: [
{
expand: true,
cwd: '<%= paths.js %>',
src: '**/*.js',
dest: '<%= paths.js %>min',
ext: '.min.js',
}
],
}
},
phpunit: {
classes: {
dir: 'app/tests/' //location of the tests
},
options: {
bin: 'vendor/bin/phpunit',
colors: true
}
}
});

// Plugin loading
grunt.loadNpmTasks('grunt-contrib-compass');
grunt.loadNpmTasks('grunt-contrib-sass');
grunt.loadNpmTasks('grunt-contrib-concat');
grunt.loadNpmTasks('grunt-contrib-uglify');
grunt.loadNpmTasks('grunt-phpunit');

// Task definition
grunt.registerTask('default', ['sass', 'concat', 'uglify', 'phpunit']);
};
Conclusion
That’s it! It can be a little overwhelming having to do all of this, but it is worth it because you know can work in a organized way.
Leve a comment bellow if you have any questions.